Painting Upholstery with Chalk Paint!
- Regan • Blooming Nest

- Mar 8, 2016
- 5 min read
Updated: Aug 17, 2022
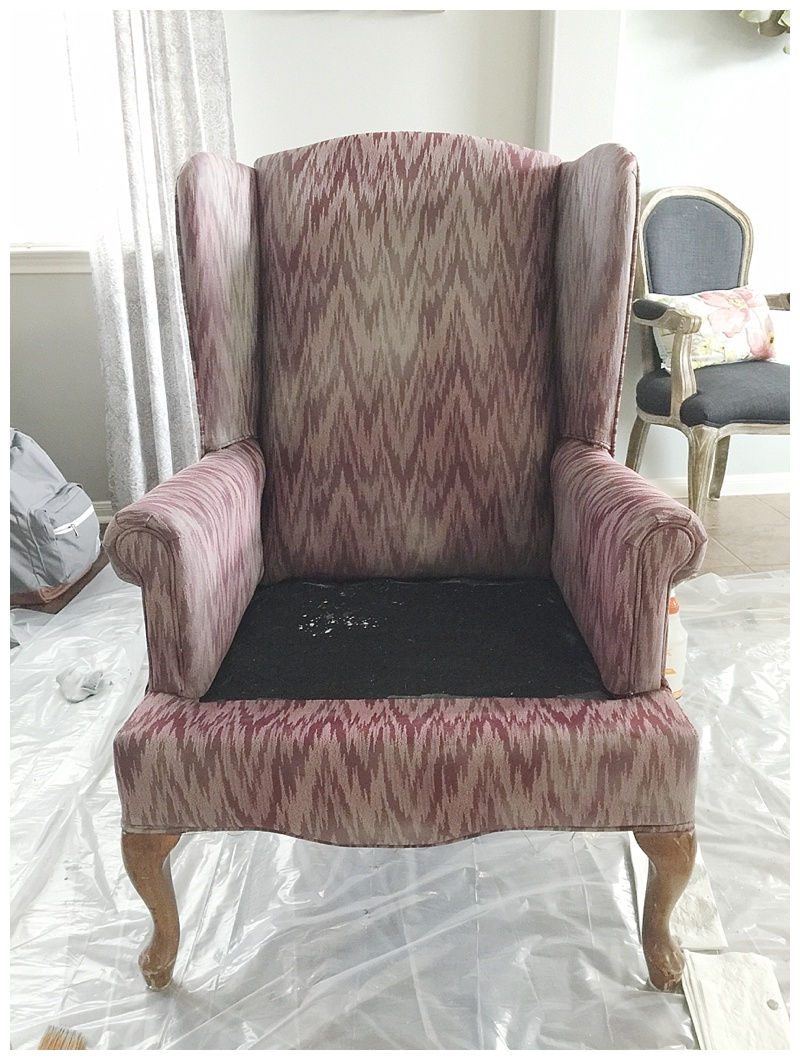
Hello from Houston! After receiving so many questions on Instagram, I decided to write a blog post on how I painted our upholstery chair with chalk paint! I was not surprised by the questions because before starting this project I was wondering all the same things! Will it be too “crunchy” and “stiff” to actually sit on? Will chalk paint get on your clothes when you sit on it? Do you need to seal it with any sort of wax or topcoat? These are all questions that I figured out through the process and now I’m here to tell you what I learned so that it’s super easy when you want to upgrade your outdated upholstery furniture!! I didn’t plan on doing a blog post when I began this project so I didn’t take great pictures, but I did get pictures between each coat and I will explain exactly what I did!! This is a great alternative to getting your chair reupholstered and is way more affordable! Let’s get started!


Chalk paint of your choice, I chose Rustoleum’s Chalked paint in the color Country Grey! It was more affordable than a lot of brands out there and worked really well!
Any chalk paint sealing wax of your choice. I already had the Valspar sealing wax so that definitely saved me money on this project.
A spray bottle to fill with water. (I bought one at Lowe’s but it ended up “squirting” instead of “spraying” if that makes sense, so I ended up emptying a spray bottle I already had and used it)
A paint brush and 120 grit sandpaper!!

Once I explain how I did this first coat you will do the same thing for every coat after. It took me four coats! (I know, thats a lot of coats and it definitely wasn’t fun at all times ha!) Just let it dry 24 hours in between each coat. I read a lot of different techniques online before I jumped in, but I quickly figured out what was working best and that is this…
Pour some chalk paint into a cup (or whatever you want to be dipping paint out of)
Pour some water into that same cup (a little less than the amount of paint you just put in)
Stir this mixture
Grab your spray bottle that is filled with water and spray a small area of your upholstery piece
Then with your paint brush get some of your watered down chalk paint and paint it on.
When you are ready to move to another area just make sure you spray it down with water first. Chalk paint is a porous paint and that is why it works for painting furniture! If it doesn’t seem like the chalk paint is absorbing into the furniture, but rather sitting on top, you do not have enough water in your mixture. Once you tell yourself you are “staining” instead of “painting” I think you will be able to get the right ratio of water to paint. But don’t be scared that it won’t absorb and make it too watery like I did on the first coat, or it will take you forever! I promise once you get started on your project, getting the right consistency is pretty easy! And if you paint a section and it is too watery and the color isn’t showing up very much, just go over it with less watery paint.
**This is a very messy project and since the chalk paint is watered down it is very easy to splash, spill and sling it around the house! Be careful!!
Let me just say, after this coat I was discouraged and very tempted to give up and put the slipcover back on the chair. Im so glad I powered through and figured out how to make each coat show up more as I went.


So after waiting 24 hours for your first coat to dry, grab some of your 120 grit sandpaper and just rub it over the whole piece. Sanding fabric seems weird, and it definitely gives you the same feeling as “fingernails on a chalkboard,” but you will be so surprised how different it feels once sanded. I really just kind of wiped the sandpaper all over it very lightly. Don’t be too aggressive with it! After sanding, you will do the exact same process as explained above. Water down your paint, spray furniture with water, paint it on!

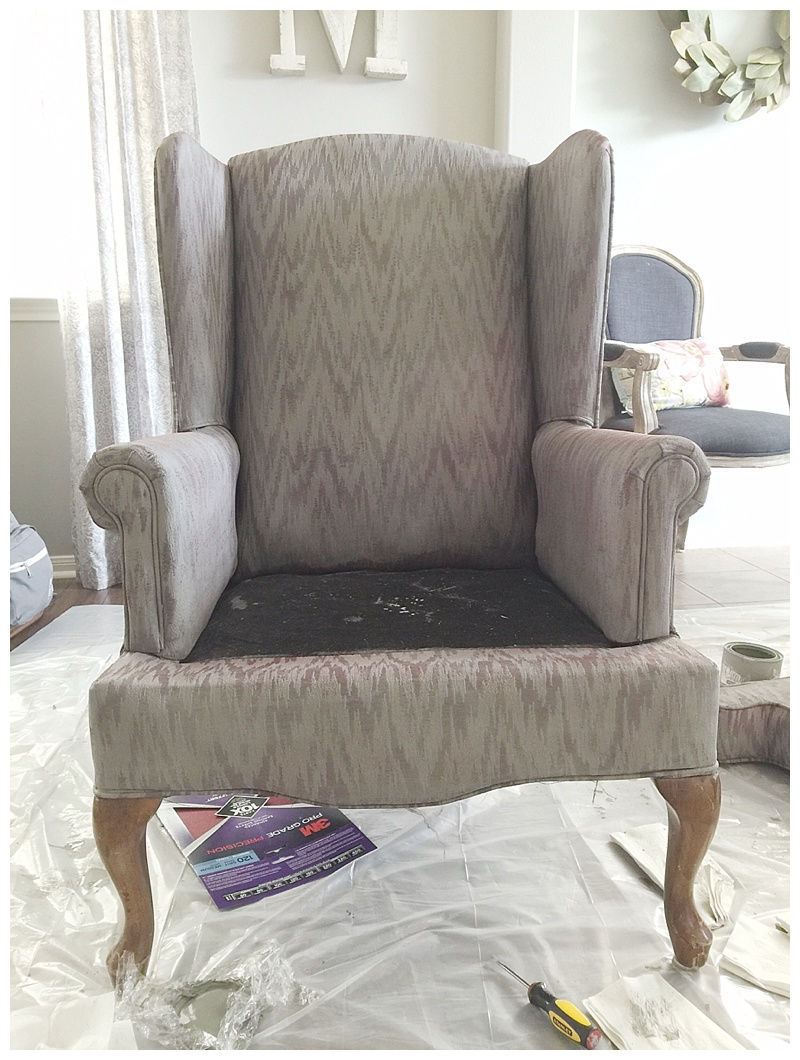
Were slowly but surely getting “gray”!! Again, after waiting 24 hours for coat number 2 to dry, go ahead and lightly sand and then paint your third coat! This may be the last coat for you! But it took me one more..


Finally the last coat! By this point I was SO ready to be done painting (my hands were sore!) and ready to get my house back in order. I hate messes! Once I finished this coat I let out a big sigh of relief!
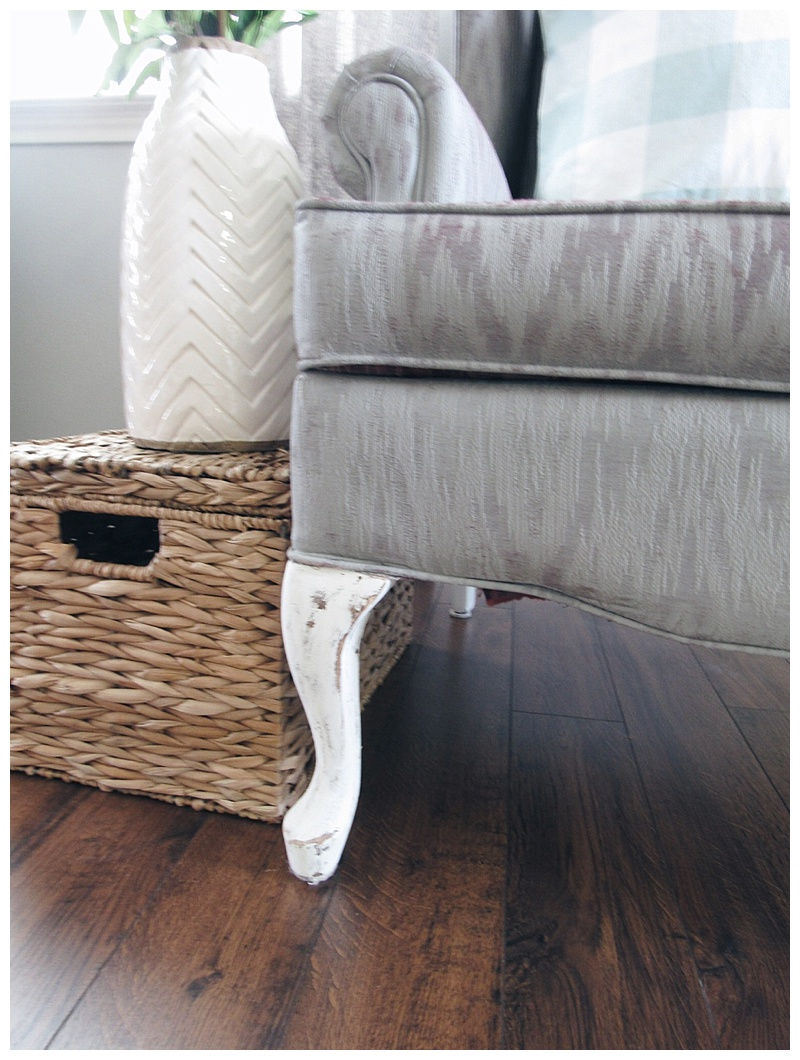
Again, I let this coat dry for 24 hours. Then I lightly sanded it one more time and grabbed my sealing wax! This was the part I had read that really makes your project look amazing! And it sure did! I just paint brushed it all over the chair in a light layer, let it dry for 5-10 minutes and then went back and wiped off the excess wax. It felt so smooth after this step! I painted the legs a creamy white color, distressed them and the entire chair was complete and looked so upgraded!!
Now for your questions!
Will it be too “crunchy” and “stiff” to actually sit on? Although it does not feel like the softest chair ever, and it may not be the chair you choose to cuddle up and take a nap on.. it does 100% still feel like fabric!! You could almost describe it as feeling like outdoor fabric. When starting this project I was not hoping to end up with my favorite chair to sit on, but rather upgrading a chair so that it would be prettier to look at! But yes, again, it is still completely functional! I wish y’all could feel it!!
Will chalk paint get on your clothes when you sit on it? Absolutely not! The chalk paint has been sealed with wax, and even before that when you sand down each layer it gets off the extra “chalkiness” that is on the chair.
Do you need to seal it with any sort of wax or topcoat? Yes, you will definitely not want to skip the wax step, as it seals the paint and makes the whole chair feel smooth to the touch! After adding this step the whole thing looked so much better!!
If you have anymore questions please leave a comment below or on instagram! Thanks for stopping by and I would love to see your painted upholstery!


Comments